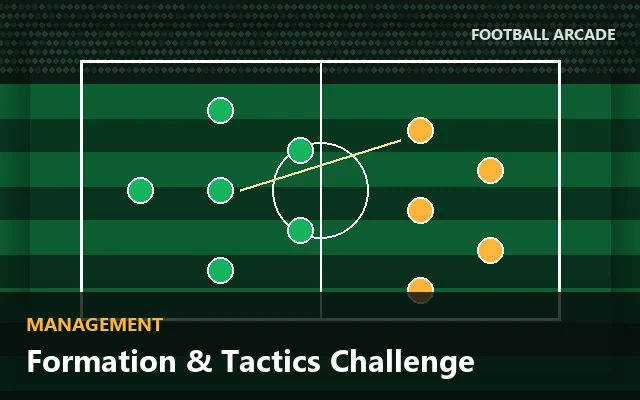
In a full simulation a formation is a set of starting positions from which behaviour emerges. In a management arcade game it is something much simpler and more legible: a bundle of attacking traits and covered threats.
Once you see it that way, choosing a formation stops being a matter of taste.
The bundles
| Formation | Attacks with | Covers | Character |
|---|---|---|---|
| 4-4-2 | Width | Flanks, aerial | Balanced, conventional |
| 4-3-3 | Width, pressing | Pressing | Aggressive, front-footed |
| 3-5-2 | Control, central overloads | Centre | Midfield-dominant |
| 5-3-2 | Transitions | Flanks, centre, pace | Defensive, counter-ready |
| 4-2-3-1 | Control, pressing | Centre | Modern, controlled |
Two shapes are worth studying because they are at the extremes.
5-3-2: three covers, one attacking trait
The back five covers flanks, centre and pace, which is more defensive cover than any other shape. The cost is that it attacks with transitions only — a single trait, and one that several opponents are explicitly strong against.
So it is the right answer against a dangerous opponent with two threats you cannot otherwise cover, and the wrong answer against a weak one, because you will struggle to score. That is the classic defensive trade-off expressed as numbers.
4-3-3: aggressive, and narrow in what it covers
Attacks with width and pressing — two traits, and pressing is a weakness for possession-based opponents — but covers only pressing. Against an opponent who threatens you two different ways, it leaves one open.
It is the best shape when the opponent's main threat is their own pressing, and a liability when their threats are elsewhere.
How to pick from a scouting note
The routine takes about ten seconds:
- Read the two threats. The scouting note names them explicitly.
- Find a formation that covers one of them. Not both — you want your approach to cover the other.
- Check its attacking traits against the opponent's weaknesses and strengths. A trait they are strong against subtracts 2, which is as bad as a covered threat is good.
- Pick the approach that covers the remaining threat and adds a trait they are weak to.
The mistake almost everyone makes first is picking a formation and an approach that cover the same threat. The model checks whether a threat is covered, not how many times, so the second one is entirely wasted.
Why coverage is worth more than attack
Look at the coefficients. Covering a threat adds 2 to your defensive rating; leaving one open subtracts 1. So the swing between covering both threats and covering neither is 6 rating points, which is roughly three goals against you.
Attacking swings are similar in size but less reliable, because they depend on your traits happening to align with that specific opponent's weaknesses. Cover first, attack second. Football Management and Tactics Games works through the full model.
Do formations mean anything real?
The bundles are a simplification, but not an arbitrary one. A back five genuinely does provide more defensive cover across the width of the pitch at the cost of attacking numbers. A front three genuinely does press more effectively and leave more space behind. A packed midfield genuinely does dominate central possession.
What the model leaves out is everything about the players, the coaching and the interaction between phases — which is exactly the difference between an arcade management game and a simulation. See Football Arcade Games vs Simulation Games.
A quick reference
- Opponent threatens the flanks? 4-4-2 or 5-3-2.
- Opponent threatens centrally? 3-5-2, 4-2-3-1 or 5-3-2.
- Opponent threatens with pace? 5-3-2 is the only shape covering it.
- Opponent threatens with pressing? 4-3-3, or pair any shape with possession.
- Opponent threatens aerially? 4-4-2.
Notice that pace is covered by exactly one shape, which makes 5-3-2 close to compulsory against fast wingers — and tells you that your approach then has to carry the whole attacking plan.
The compulsory-formation check
The single most useful habit in a tactics game, and it takes about five seconds.
Before considering anything else, ask: is one of the opponent's threats covered by only one formation? If so, that formation is compulsory and the decision is made — your approach then has to do whatever job is left over.
In our game, pace is the clearest case: only 5-3-2 covers it. Aerial threats are nearly as restrictive, covered only by 4-4-2. So against fast wingers or a target man, the formation chooses itself, and trying to be clever there costs you a goal.
| Threat | Covered by | Flexibility |
|---|---|---|
| Pace | 5-3-2 only (or a low block approach) | None |
| Aerial | 4-4-2 only | None |
| Flanks | 4-4-2, 5-3-2 | Some |
| Centre | 3-5-2, 5-3-2, 4-2-3-1 (or a low block) | Plenty |
| Pressing | 4-3-3 (or a possession approach) | Some |
| Space | Counter-attack or low block only | Approach-side, not formation |
Reading that table once is worth more than several seasons of experimentation: it tells you immediately which half of your decision is forced and which is free.